My Unity Projects
Graveyard fence
That was my first structure created in Unity. I wanted it to come out old and rusty, because according to my lore this graveyard is few centuries old.
The cap on top of a pillar gave me the most trouble at a time. I set a shaping size to like seven decimal places to get it right. All because slab and prism are separate things.
Graveyard Fence-gate was also added.
Once I add a lockpicking I'll add a nice rusty gate to open and close.


Graves
Initially I added only gravestones themselves. They are arches with like 50 sides just to add detail and create correct shape.


In a future I’m planning to apply a script to those dirt patches so if you'll use raise dead you'll actually raise a zombie. Also I think I ll use these patches as a dirt road, simply because I need it to play a different sound when a player walks on it.
First willage house
What you’re seeing here is my first attempt at medieval fantasy style house. It took me couple days to do it. I actually checked out how to do a proper thatch roof. I think I did a roof construction support too thick for this one.
While making a window I created a glass material. It’s not just empty hole. Only thing with this material is I couldn't find reflectivity. Proper glass should reflect some of the viev.
For the shape of the window I decided to go with a fancy fantasy arch. To create a frame first I had to add a arch shape to a wall. While texturing, it took me a while to set correct size of a texture so it fited the rest of the wall.


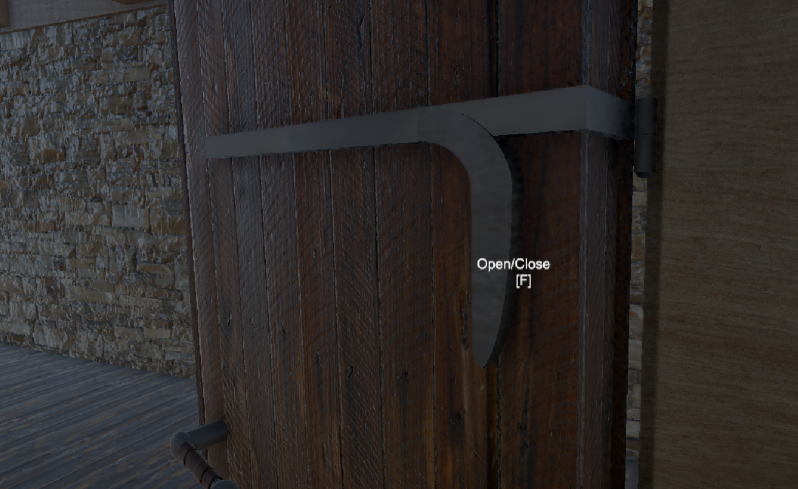
Fantasy medieval door
These door might look simple, but they’re not. It took me like 3 days to get all the detail just right. By the way they are fully working door with animations and a script. I’ll show you later on how exactly it works.
Everything you see here was placed and scaled manually. Originally I did made a door handle too large so I had to scale it down. But that in return broke all the shapes of spheres and pipes, so I had to correct them again. I also didnt knew how to use “Mirror object”, so the other side is just copied and manually fited in.
Door have a proper hinges. The rotation axis is set directly in them so the door open and close like in real life. Also the door frame was made in a way that hinges don’t go beyond it.


That’s the in game view. As you can see you can open and close the door. Door while open have a gap that the hinges are visible through it (just like in real life). Also there are small empty spaces on top and under the door.
Door have a ridge that fits into the door frame. You can see it in the video down bellow. Also it demonstrates that my door work. Truth be told I didn’t wanted to make these door too fancy because it’s just a commoners house.
Door script
Public animator allows a script to access animation bools that will be shown later. Open text is the “Open/Close” that you see when in range of the interaction. Thats why I’m using inReach bool. At the start of the game it’s not in reach (void Start method).
On trigger enter method uses collider other, witch means other collider tagged as reach is the trigger for this code. Code inside the if statement says that inReach bool is true and the “Open/Clse” text is displayed. On trigger exit method does the opposite because player needs to be able to end the interaction. Void update is a dynamic method that works in real time while the game is played. Under the condition of being in reach, player can interact with the door.
These are the methods that allow the door to open, stay open and close. They are accessing the animation bools thanks to the public animator that this script is using.


Reach tool
The player inside the camera has an invisible long cube that is a reach tool. It is tagged as reach so whenever player touches with it something that has a door script or interaction script, player can then open doors and pick up items. Important to know that this is better than the raycast because you dont need pickup field radius collider. You just need one generic collider on a door or an item. You don’t need two like with the raycast.
Second village house
I expanded upon the first house and made it larger, more complexed. It has multiple doors, balcony, staircase and more realistic roof construction. I’m planing to add much more variations of houses so the game won’t be so repeatable.
First floor and the balcony has to be properly supported so on every corner I added those supports.
To a regular stairs shape I added planks to make it more immersive and not so raw state of being. Later on I plan to add some interior decorations and furniture.


Once I got better in probuilder I decided to add a fancy little balcony to the house.
This time I made a roof construction more realistic and thinner.


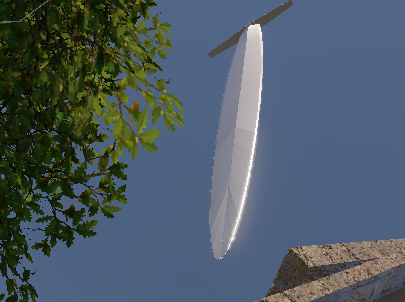
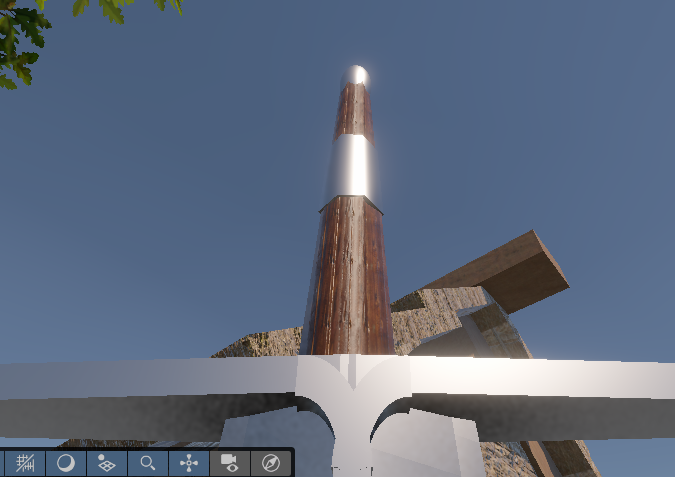
Steel longsword
To add detail I always make my models far larger than they should be. Once they’re ready I’m scaling them down.
It took me 5 days to get the blade ready. As you can see the blade has an actual edge. Also I am a white weapon fan so I have OCD on making any weapon realistic. It means that I spent extra day or two to make sure the blade isn’t too thick and that it has a correct shape. Each point that you see here was moved manually with 0.001 sensitivity.
Blade itself is actually an really long arch. Once one arch was ready I mirrored it four times to achieve this shape.


After completing the modell I created a steel material. Also I made the crossguard thin at the ends. I missed that detail during modelling.
As you can see, after descaling the blade is realistically thin. As a sword enthusiast I can tell you that swords aren’t heavy and they don’t have to be thick to cause serious damage. Average longsword weights around 1.2 kg not 12 kg.
It’s not an accident or the lack of skill. The hilt is made hexagon intentionally. Rounded hilts tend to slip out of the grasp of the welder or break edge alignment. Hexagon hilt prevents both of these and it’s more comfortable to weald. Also I corrected the hilt to be wider close to the crossguard. It makes the sword look better proportionally.


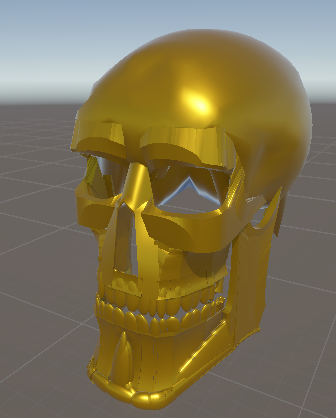
Skull
Next up I made a skull. It took me month to make it but it was worth it. In a fantasy universe that I create there is plenty of uses for it. It can be used as decoration and even as a base of a head for humans, dwarfs, elves name it. That’s why I was soo keen on making it physically as accurate as it can be to real life.
Skull is the most complicated model that I made so far. I have to mention I did all of that in Probuilder. I do have Blender but it doesn’t work because I have too weak graphic card. First two weeks I spent on making the jaw.
The curves like this I made with cylinders. Each one of them moved, scaled and rotated manually. In one skull there is about 200 of them.


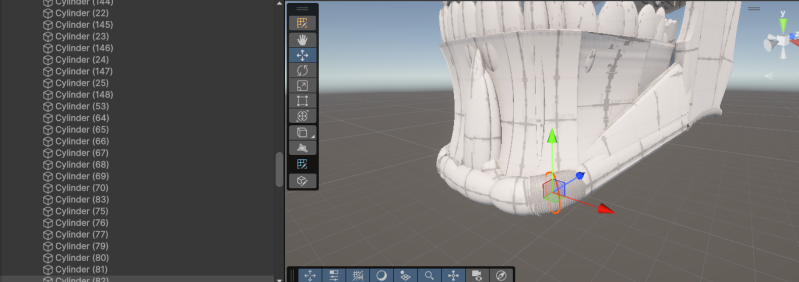
The curve that adds detail to mandible contains about 50 cylinders. The small imperfections that you see aren’t visible after descaling. I tried to patch them out as best as I could.
I also modeled the inside of the skull so it can be placed on top of something or used as a skeleton part.
I made sure that a skull has 32 teeth. I wanted to be biologically accurate with this model.
For now there are two variations of a skull. First one is the golden skull. The thing is with the material I was going for brass look rather than gold.
Second one is the darker steel skull witch you can see used in my photo frame. Yes I made that frame in unity. Also there is golden variant of this frame.


Golden Frame
Originally I wanted it to me my Inventory frame. Later on I decided it might be a good main menu panel. It will contain: New game, Load game, Options, Save game and Quit game.
Also I think it looks good as a painting frame. Under the right lighting it will give of that rich noble atmosphere. It was my first take at fancy decorations.


Inventory system
Everything works thanks to Pickable item script witch is on a sword, Inventory system script, inventory slot script that makes slots actual slots and drag and drop script that allows me to move a sprite. The way I make sprites is by taking a screen of an actual item and making it a PNG. After that I import it into unity and I’m making it a sprite. Sprite is then applied on a panel that serves as inventory version of an item.

Stwórz łatwo własną witrynę internetową z Webador